Ditching Magic Links for OTP: A Tutorial for Next.js and NextAuth
25 March 2024
In the world of mobile-centric user traffic, as is the case with AuChef, where mobile currently accounts for 81% of our user traffic, the limitations of Magic Links become increasingly apparent. Magic Links require consistent browser sessions for successful transactions, which often poses challenges with in-app browsers on mobile devices.
For instance, a user might make the initial request using the Chrome browser, but when they open the Magic Link in their email app, iOS automatically opens it in the default browser, Safari (or worse, a self-contained in-app browser). If this happens, the transaction fails. To the user, it seems like they are being asked to log in over and over again.
You might ask, why not let customers use a password? Essentially, passwords are just not secure enough.
Enter OTPs (One-Time Passwords). At AuChef we build with Next.js and NextAuth, and while NextAuth doesn’t currently offer OTP as a built-in provider, it can be customized to send OTPs instead of magic links.
In the following sections, we will walk through the steps to customize NextAuth for OTPs. Don’t want to read through all of that and just want the code? Here you go: https://github.com/frankolson/nextauth-otp-demo
Customized token generation
First up, we have to change the token already generated by NextAuth to match our OTP format: 6 random digits.
// app/api/auth/[...nextauth]/route.ts
import { randomInt } from "crypto";

// ...

export const authOptions: AuthOptions = {
  providers: [
    EmailProvider({
      async generateVerificationToken() {
        return gernerateOTP().toString()
      },
      // ...
    }),
  ],
  // ...
};

function gernerateOTP() {
  return randomInt(100000, 999999);
};

// ...
Using MailCatcher, we can see the verification email that was sent with the following magic link: http://localhost:3000/api/auth/callback/email?callbackUrl=http%3A%2F%2Flocalhost%3A3000%2F&token=436306&email=jim.halpert%40dm.com
Notice the &token=436306 query parameter in the URL, it now fits our 6-digit OTP criteria instead of the 32-character hexadecimal string that is generated by default.
Reduced timing for increased security due to smaller token
Unfortunately, now that we’ve reduced the complexity of the token, we’ve made brute force attacks easier. By reducing the max time the token can be used, you can help prevent brute force attacks. Here we’ll change the default set by NextAuth to 3 minutes before the token expires.
// app/api/auth/[...nextauth]/route.ts

// ...

export const authOptions: AuthOptions = {
  providers: [
    EmailProvider({
      maxAge: 3* 60, // 3 minutes
      // ...
    }),
  ],
  // ...
};

// ...
Customized email
Next, we need to modify the email NextAuth sends off as a part of sign-in verification to provide the OTP instead of the default magic link.
// app/api/auth/[...nextauth]/route.ts

// ...

export const authOptions: AuthOptions = {
  providers: [
    EmailProvider({
      async sendVerificationRequest({
        identifier: email,
        token,
        url,
        provider: { server, from },
      }) {
        const { host } = new URL(url)
        const transport = createTransport(server)
        await transport.sendMail({
          to: email,
          from,
          subject: `Sign in to ${host}`,
          text: text({ token, host }),
          html: html({ token, host }),
        })
      }
      // ...
    }),
  ],
  // ...
};

function html(params: { token: string; host: string; }) {
  const { token, host } = params

  const escapedHost = host.replace(/\./g, "​.")

  const color = {
    background: "#f9f9f9",
    text: "#444",
    mainBackground: "#fff",
  }

  return `
<body style="background: ${color.background};">
  <table width="100%" border="0" cellspacing="20" cellpadding="0"
    style="background: ${color.mainBackground}; max-width: 600px; margin: auto; border-radius: 10px;">
    <tr>
      <td align="center"
        style="padding: 10px 0px; font-size: 22px; font-family: Helvetica, Arial, sans-serif; color: ${color.text};">
        Sign in to <strong>${escapedHost}</strong>
      </td>
    </tr>
    <tr>
      <td align="center" style="padding: 20px 0;">
        <table border="0" cellspacing="0" cellpadding="0">
          <tr>
            <td align="center"><strong>Sign in code:</strong> ${token}</td>
          </tr>
        </table>
      </td>
    </tr>
    <tr>
      <td align="center"
        style="padding: 0px 0px 10px 0px; font-size: 16px; line-height: 22px; font-family: Helvetica, Arial, sans-serif; color: ${color.text};">
        Keep in mind that this code will expire after <strong><em>3 minutes</em></strong>. If you did not request this email you can safely ignore it.
      </td>
    </tr>
  </table>
</body>
  `;
}

function text(params: { token: string, host: string }) {
  return `
  Sign in to ${params.host}

  Sign in code: ${params.token}

  Keep in mind that this code will expire after 3 minutes. If you did not request this email you can safely ignore it.
  `;
}

// ...
The email sent will now look like this:
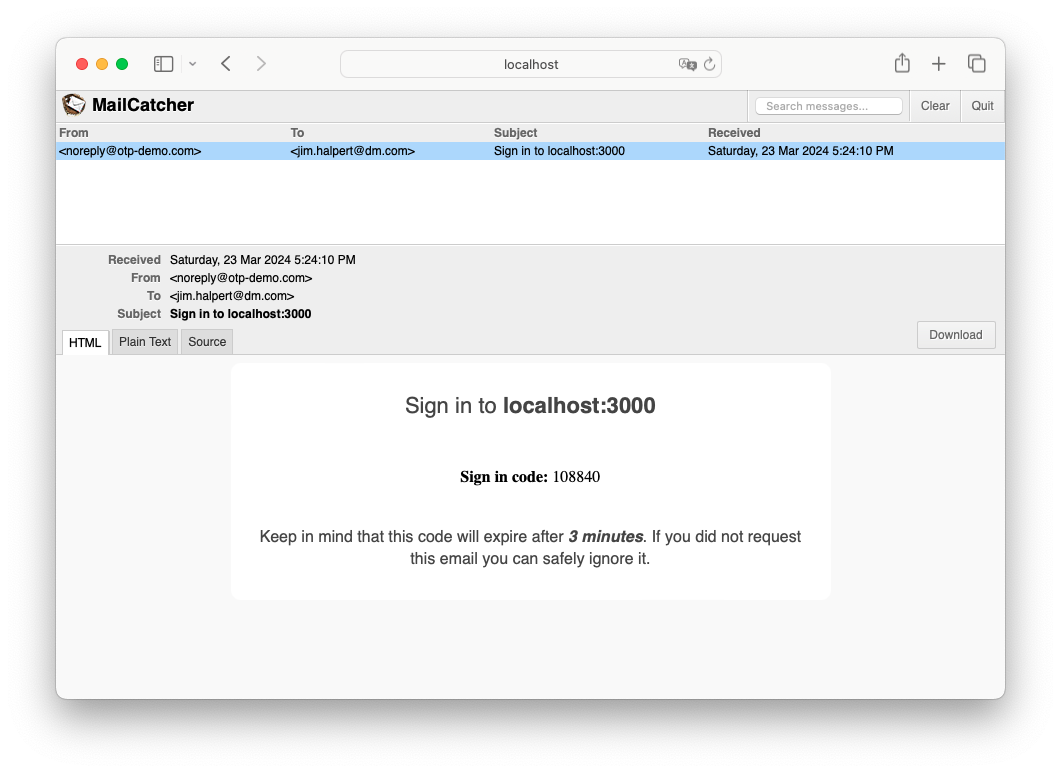
You can read more on customizing emails in the NextAuth docs here: https://next-auth.js.org/providers/email#customizing-emails.
React components for handling OTP submission
NextAuth provides some authentication pages by default, one of which we need to customize: the sign-in page. The first step is to change the NextAuth configuration, instructing it to use a custom page for signing in.
// app/api/auth/[...nextauth]/route.ts

// ...

export const authOptions: AuthOptions = {
  // ...
  pages: {
    signIn: '/auth/signin'
  }
};

// ...
Next, let’s create a pretty basic sign-in page that redirects the user if they’re already logged in.
// app/auth/signin/page.tsx
import { getServerSession } from "next-auth";
import { authOptions } from "@/app/api/auth/[...nextauth]/route";
import { redirect } from "next/navigation";
async function authenticationPrecheck(): Promise<void> {
const session = await getServerSession(authOptions)
if (session?.user) return redirect("/private")
}
export default async function Signin() {
await authenticationPrecheck()
return (
<div className="border border-gray-200 bg-white rounded-md shadow-md p-4 max-w-md mx-auto">
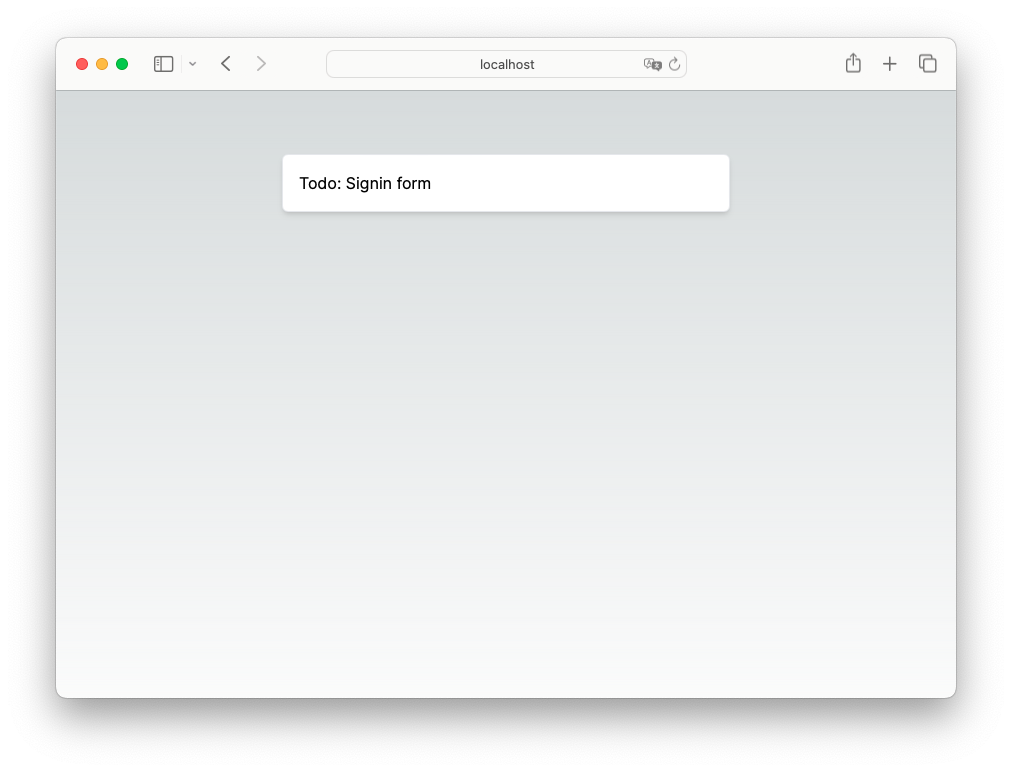
Todo: Signin form
</div>
);
}
The sign-in page will now look like this:
This walkthrough assumes there’s already a /private page setup with authentication for testing. Let’s make sure the authentication logic of that page points to the newly created sign-in page.
// app/private/page.tsx
import Link from "next/link";
import { redirect } from "next/navigation";
import { getServerSession } from "next-auth";
import { authOptions } from "@/app/api/auth/[...nextauth]/route";

async function authenticate() {
  const session = await getServerSession(authOptions);
  if (!session) return redirect("/auth/signin");
}

export default async function Private() {
  await authenticate();

  return (
    <>
      <h1 className="text-3xl font-extrabold mb-4">
        Private page
      </h1>

      <Link href="/" className="text-blue-500 hover:underline">
        Link to the home page
      </Link>
    </>
  );
}
Now we need to add a two-stage form. The first stage: email submission. The second stage: OTP verification. In the next couple of code blocks, we’ll build the client-side form component and the email submission stage.
First, we’re going to create a parent sign-in form to handle the multiple stages. The flow will be:
- Collect the email from the user
- Send a sign-in request to NextAuth which triggers an email to be sent to the user
- Collect the OTP from the user
- Use the email and OTP to finalize the authentication process
The first two steps of the flow will be handled by the email submission form which should deliver the email for use in the OTP verification handling the second two steps in the flow. It should be noted that EmailSubmission and OTPVerification don’t exist yet, but we’ll add them here now in anticipation.
// app/auth/signin/SignInForm/index.tsx
"use client";

import { useState } from "react";
import EmailSubmission from "./EmailSubmission";
import OTPVerification from "./OTPVerification";

export default function SignInForm() {
  const [verificationEmail, setVerificationEmail] = useState<string>('')

  return verificationEmail
    ? <OTPVerification email={verificationEmail} />
    : <EmailSubmission onSubmit={setVerificationEmail} />
}}
Next, is the email submission stage. In this client-side component, we collect the email from the user and send it to NextAuth’s signIn function, making sure to configure that function to prevent the default redirects. If there are any errors, we add them to the URL as query parameters to be used by a VerificationAlert component we will be creating later on. However, if the function call to signIn is successful
// app/auth/signin/SignInForm/EmailSubmission.tsx
"use client";

import { useState } from "react";
import { signIn } from "next-auth/react";
import { useRouter } from "next/navigation"

interface Props {
  onSubmit: (email: string) => void
}

export default function EmailSubmission({ onSubmit }: Props) {
  const [email, setEmail] = useState('')
  const [isSubmitting, setIsSubmitting] = useState(false)
  const router = useRouter()

  async function handleEmailSubmission(e: React.FormEvent<HTMLFormElement>) {
    e.preventDefault()
    setIsSubmitting(true)

    const response = await signIn('email', { email, redirect: false })
    if (response?.error) {
      if (response?.url) {
        router.push(response.url)
      } else {
        router.replace(`/auth/signin?error=${encodeURIComponent(response.error)}`)
      }
    } else {
      onSubmit(email)
    }

    setIsSubmitting(false)
  }

  return (
    <form onSubmit={handleEmailSubmission} className="flex flex-col w-full space-y-6">
      <div>
        <input
          id="email"
          name="email"
          type="email"
          autoComplete="email"
          required
          className="block w-full px-4 py-2 text-sm text-gray-900 border border-gray-300 rounded-md shadow-sm focus:ring-blue-500 focus:border-blue-500"
          placeholder="Email address"
          value={email}
          onChange={(e) => setEmail(e.target.value)}
        />
      </div>

      <button
        type="submit"
        disabled={isSubmitting || !email}
        className="flex justify-center w-full px-4 py-2 text-sm font-medium text-white bg-blue-600 border border-transparent rounded-md shadow-sm disabled:opacity-50 hover:bg-blue-700 focus:outline-none focus:ring-2 focus:ring-offset-2 focus:ring-blue-500"
      >
        {isSubmitting ? 'Sending email...' : 'Sign in / Sign up'}
      </button>
    </form>
  )
}
Now that we have the email address to verify and the OTP email has been sent, we can show the user a form to enter the OTP received. We can use those two values to compose the URL for final verification and send a manual request. To avoid redirect hell, we can include a callbackUrl query parameter in the request, which will be returned as url in the request only if successful. If that value is not returned, we can assume there was an authentication error and add the appropriate error query parameter to the URL which will trigger a verification alert to be rendered (again, part of a VerificationAlert component we will create soon).
// app/auth/signin/SignInForm/OTPVerification.tsx
"use client";

import { useState } from "react";
import { useRouter } from "next/navigation"

interface Props {
  email: string
}

export default function OTPVerification({ email }: Props) {
  const [code, setCode] = useState('')
  const [isSubmitting, setIsSubmitting] = useState(false)
  const router = useRouter()

  async function handleOTPVerification(e: React.FormEvent<HTMLFormElement>) {
    e.preventDefault()
    setIsSubmitting(true)

    const formattedEmail = encodeURIComponent(email.toLowerCase().trim())
    const formattedCode = encodeURIComponent(code)
    const formattedCallback = encodeURIComponent('/private')
    const otpRequestURL = `/api/auth/callback/email?email=${formattedEmail}&token=${formattedCode}&callbackUrl=${formattedCallback}`
    const response = await fetch(otpRequestURL)

    if (response) {
      if (response.url.includes('/private')) {
        router.push(response.url)
      } else {
        router.replace(`/auth/signin?error=Verification`)
      }
    }

    setIsSubmitting(false)
  }

  return (
    <form onSubmit={handleOTPVerification} className="flex flex-col w-full space-y-6">
      <div>
        <input
          id="code"
          name="code"
          type="number"
          minLength={6}
          maxLength={6}
          required
          className="block w-full px-4 py-2 text-sm text-gray-900 border border-gray-300 rounded-md shadow-sm focus:ring-blue-500 focus:border-blue-500"
          placeholder="One time passcode"
          value={code}
          onChange={(e) => setCode(e.target.value)}
        />
      </div>

      <p className="text-sm">
        Keep in mind, the emailed passcode will expire after <strong><em>3 minutes</em></strong>
      </p>

      <button
        type="submit"
        disabled={isSubmitting || !code || code.length !== 6}
        className="flex justify-center w-full px-4 py-2 text-sm font-medium text-white bg-blue-600 border border-transparent rounded-md shadow-sm disabled:opacity-50 hover:bg-blue-700 focus:outline-none focus:ring-2 focus:ring-offset-2 focus:ring-blue-500"
      >
        {isSubmitting ? 'Verifying...' : 'Verify'}
      </button>
    </form>
  )
}
To show authentication errors, we’ll create a component that monitors the URL for an error query parameter. Based on the value or error we can show different messages.
// app/auth/signin/VerificationAlert.tsx
"use client"

import { useSearchParams } from "next/navigation"

const ERROR_MESSAGES = {
  Configuration: "There is a problem with the server configuration. Please contact the site administrator.",
  AccessDenied: "You don't have permission to sigin or register on this site.",
  Verification: "That token is not valid. Please try again or refresh the page to request a new one.",
  Default: "There was an unknown error. Please refresh the page and try again."
}

export default function VerificationAlert() {
  const params = useSearchParams()
  const error = params.get('error') as keyof typeof ERROR_MESSAGES

  return error ? (
    <div className="bg-red-50 border-l-4 border-red-400 text-sm text-red-700 mb-3 p-4">
      {ERROR_MESSAGES[error] || ERROR_MESSAGES.Default}
    </div>
  ) : null
}
To finish everything up, we’ll now modify the sign-in page to use the newly created VerificationAlert and SignInForm components. As a side note, the logic in these components was extracted because Signin is a server component by default which does not allow for the use of React hooks like useState and Next.js hooks like useSearchParams.
// app/auth/signin/page.tsx
import { getServerSession } from "next-auth";
import { authOptions } from "@/app/api/auth/[...nextauth]/route";
import { redirect } from "next/navigation";
import SignInForm from "./SignInForm";
import VerificationAlert from "./VerificationAlert";

async function authenticationPrecheck(): Promise<void> {
  const session = await getServerSession(authOptions)
  if (session?.user) return redirect("/private")
}

export default async function Signin() {
  await authenticationPrecheck()

  return (
    <div className="border border-gray-200 bg-white rounded-md shadow-md p-4 max-w-md mx-auto">
      <VerificationAlert />
      <SignInForm />
    </div>
  );
}
Now that everything is connected, we can observe the full login flow:
In conclusion, OTPs provide a more secure and mobile-friendly alternative to Magic Links. By customizing NextAuth, you can easily implement OTPs in your application.
If you have any feedback or questions, feel free to reach out on twitter (@thinkolson). And don’t forget to check out AuChef!